Markdown → Notion in 60 Seconds
Send Markdown to Notion via API in under a minute. Copy‑paste examples for cURL, Node, and Python, plus practical examples.
M2N
Product
Overcome Zapier's native Notion limitations. Send markdown tables, deeply nested content, and large text blocks reliably.
No limitations
Zapier's native Notion integration has limitations that can break your automations. Mark2Notion handles everything automatically with no restrictions.
Transform any data source into formatted Notion content:
You'll need four items to get started:
1. Get Your Mark2Notion API Key
Sign up free • 100 requests/month included
2. Create a Notion Integration
ntn_)3. Share Your Notion Page
4. Get Your Page ID
Copy from your Notion page URL:
https://notion.so/Your-Page-Title-[PAGE_ID_HERE]
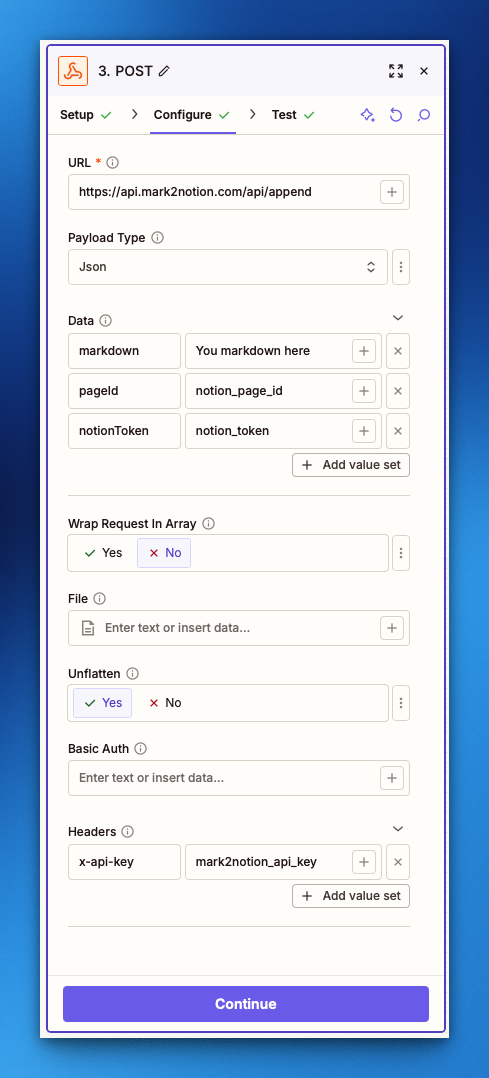
Add a "Webhooks by Zapier" action with "POST" method to send markdown content directly to your Notion page.
Step 1: Choose App & Event
Step 2: Set Up Action
URL
https://api.mark2notion.com/api/append
Payload Type
JSON
Data (add fields)
Headers (add header)
In your Zap editor, click the "+" button to add a new action step.
Search for "Webhooks by Zapier" and select it.
Select "POST" as the event type and click Continue.
https://api.mark2notion.com/api/appendx-api-key with your API keyClick "Test action" to verify everything works. You should see content appear in your Notion page.
Can't find the answer you're looking for? Reach out to our customer support team or see the API documentation.
ntn_x-api-key header100 requests/month included • No limitations
Learn how to integrate Mark2Notion into your automation workflows, handle complex scenarios, and get the most out of our API.
Send Markdown to Notion via API in under a minute. Copy‑paste examples for cURL, Node, and Python, plus practical examples.
Product
Turn any n8n workflow into formatted Notion pages. Includes copy‑paste HTTP node configs for Convert and Append endpoints.
Guides
Turn any Make.com workflow into formatted Notion pages. Includes detailed guide for Convert and Append endpoints.
Guides
Send markdown to Notion via API without wrestling with complex block JSON. Handles tables, nested lists, and long content automatically.
Guides
Backup and sync Notion content to Markdown. Perfect for version control, static sites, and content migration.
Guides